Summary
In this article, I will show you how to display your Microsoft To Do or Calendar using Git and Microsoft graph toolkit. This is a great way to share your tasks or calendar with your family or friends. You can also use it to display your tasks or calendar on your website.
Setup
1. Create git repository.
- I have named mine “MyAgenda” https://github.com/ValerasNarbutas/MyAgenda
- add index.html file with following content
1
2
3
4
5
6
7
8
9
10
11
12
13
14
15
16
17
18
19
20
21
22
23
24
25
26
27
28
29
30
31
32
33
34
35
36
37
38
39
40
41
42
43
44
<!DOCTYPE html>
<html>
<head>
    <meta charset='utf-8'>
    <meta http-equiv='X-UA-Compatible' content='IE=edge'>
    <title>My agenda</title>
    <meta name='viewport' content='width=device-width, initial-scale=1'>
    <link rel='stylesheet' type='text/css' media='screen' href='main.css'>
    <script src='main.js'></script>
</head>
<body>
    <script src="https://unpkg.com/@microsoft/mgt@2.6.0/dist/bundle/mgt-loader.js"></script>
    <mgt-msal2-provider
        client-id="[AAD APP ClientID]"
        scopes="User.Read,
            User.ReadBasic.All,
            Calendars.Read,
            Tasks.Read,
            Tasks.ReadWrite">
    </mgt-msal2-provider>
    <div style="display: flex;">
        <mgt-login>
            <template data-type="signed-in-button-content">
                <div></div>
              </template>
        </mgt-login>
    </div>
    <div class="features">
        <div class="header">
            <div class="title">
            <h2>My agenda</h2>
            <div class="row">
                <div class="column"><h3>Calendar events</h3></div>
            <div class="column"><h3>To do list</h3></div>
            </div>
            </div>
        </div>
        <div class="row" id="content">
            <div class="column" id="mgt-col"><mgt-agenda /></div>
            <div class="column" id="mgt-col"><mgt-todo /></div>
        </div>
    </div>
</body>
</html>
2. Add main.css file with following content
1
2
3
4
5
6
7
8
9
10
11
12
13
14
15
16
17
18
19
20
21
22
23
24
25
26
27
28
29
30
31
32
33
34
35
36
37
38
39
40
41
42
43
44
45
46
47
48
49
50
51
52
53
54
55
56
57
58
59
60
61
62
63
64
65
66
body,
#root>div {
    background-color: #F3F2F1;
}
.features {
    min-height: 80vh;
    margin: 20px;
    background-color: #FFF;
    box-shadow: 0px 1.2px 3.6px rgba(0, 0, 0, 0.11), 0px 6.4px 14.4px rgba(0, 0, 0, 0.13);
    border-radius: 4px;
    font-family: 'Segoe UI', Tahoma, Geneva, Verdana, sans-serif;
}
.header {
    display: flex;
    background-color: #f0f0f0;
}
.title {
    margin-top: 20px;
    margin-left: 10px;
    width: 100%;
}
.title h2 {
    font-size: 24px;
    padding-left: 5px;
    display: inline;
    font-weight: 600;
}
.title h3 {
    float: left;
    width: 32%;
    background:transparent;
    font-size: 16px;
    margin-bottom: 10px;
    padding-left: 10px;
    padding-top: 10px;
    color: #8A8886;
    font-weight: 600;
}
mgt-login {
    margin-left: 20px;
    --avatar-size: 60px;
    --font-family: 'Segoe UI';
    --font-size: 20px;
    --font-weight: 700;
    --color: black;
    --text-transform: none;
    --line2-font-size: 14px;
    --line2-font-weight: 400;
    --line2-color: #8A8886;
    --line2-text-transform: none;
}
#content, html, body {
    height: 98%;
  }
#mgt-col {
  float: left;
  width: 32%;
  background:transparent;
  height:500px;
  overflow: hidden;
  padding: 5px;
  margin-top: 5px;
}
#mgt-col:hover {
  overflow-y: auto;
}
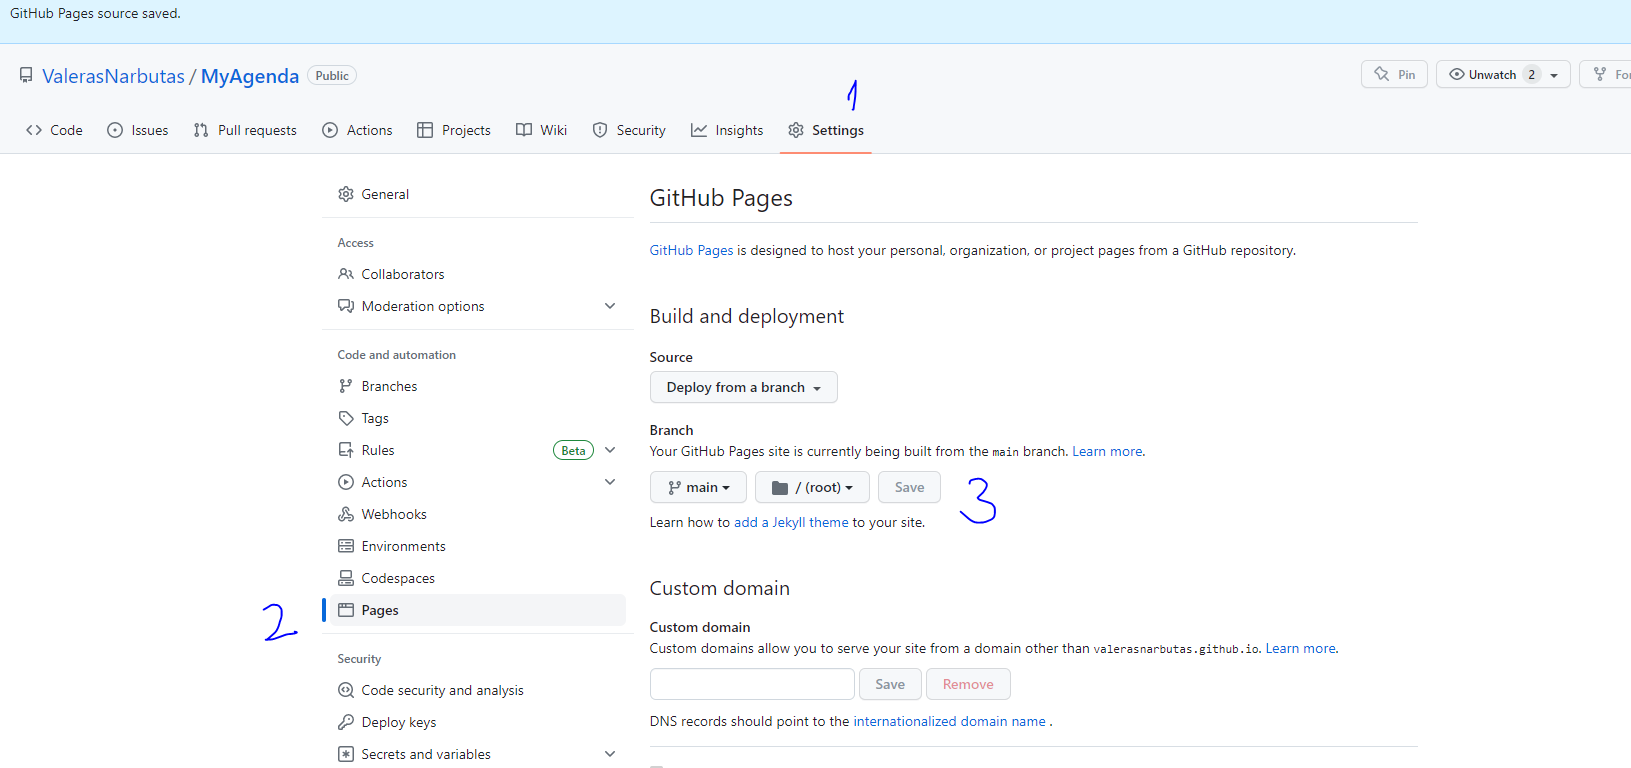
3. Enable GitPages in repo
- Go to repo Settings
- Scroll down to GitHub Pages section
- Select master branch and click Save
- You should be able to access your page via link like this: https://valerasnarbutas.github.io/MyAgenda/ were “valerasnarbutas” is your username and “MyAgenda” is your repo name
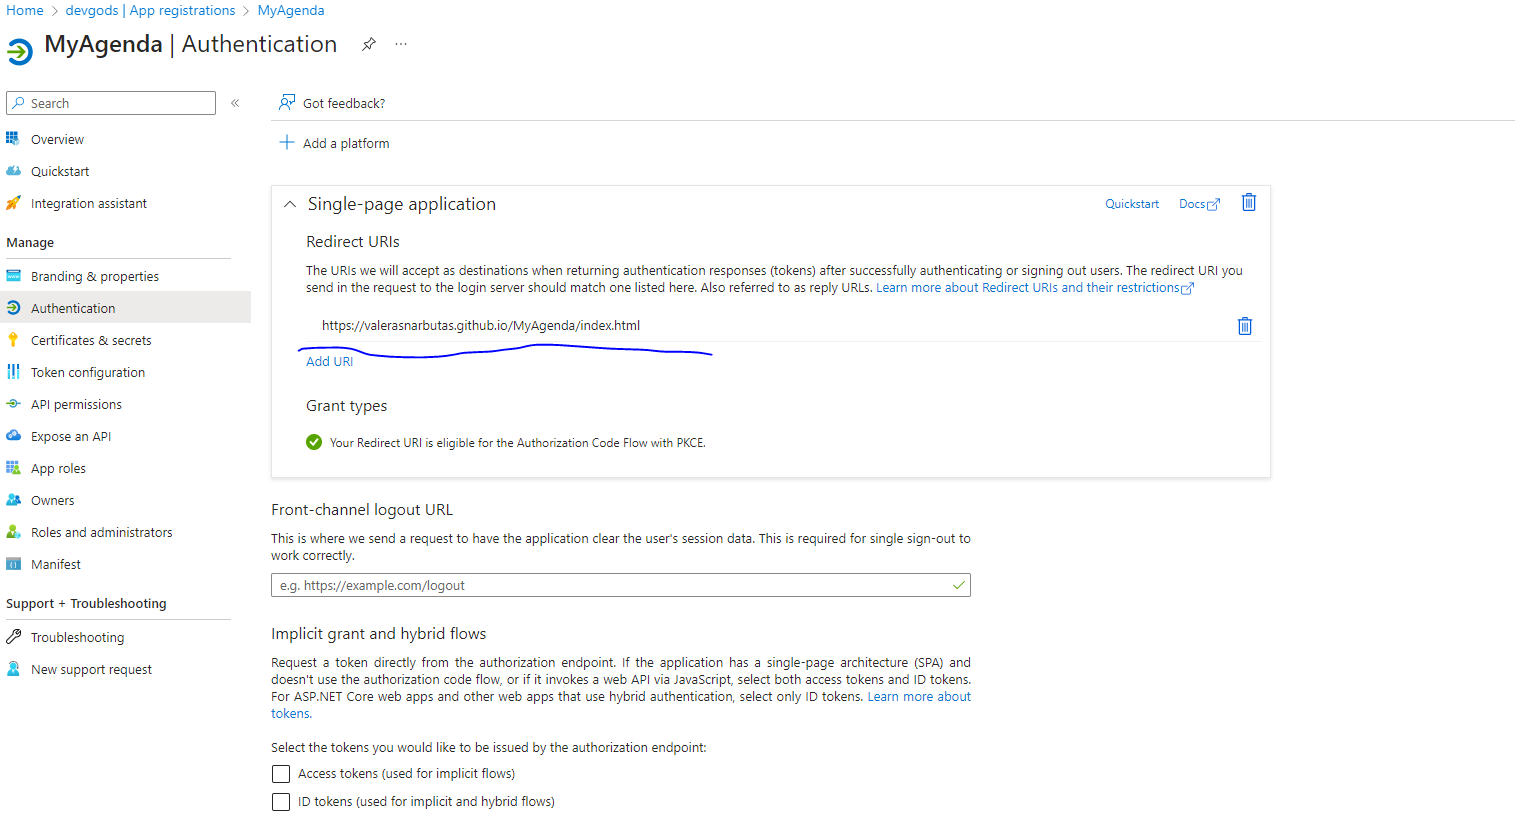
4. Go to Microsoft Azure portal and register new app
- Go to Azure Active Directory
- Select App registrations
- Click New registration
- Enter name for your app
- Select Supported account types
- Enter redirect URI (this is the link to your GitPages site plus index.html, for example https://valerasnarbutas.github.io/MyAgenda/index.html)
- Click Register
- Copy Application (client) ID
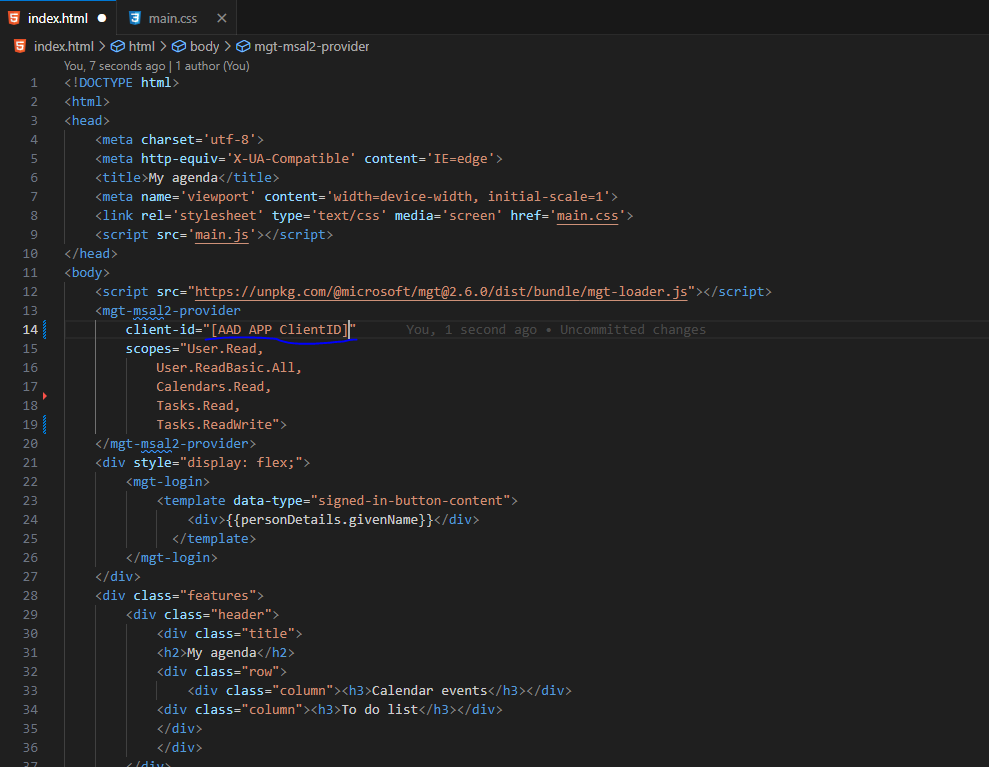
5. With your app client ID
- go back to your GitPages site
- replace “[AAD APP ClientID]” with your app client ID in index.html file
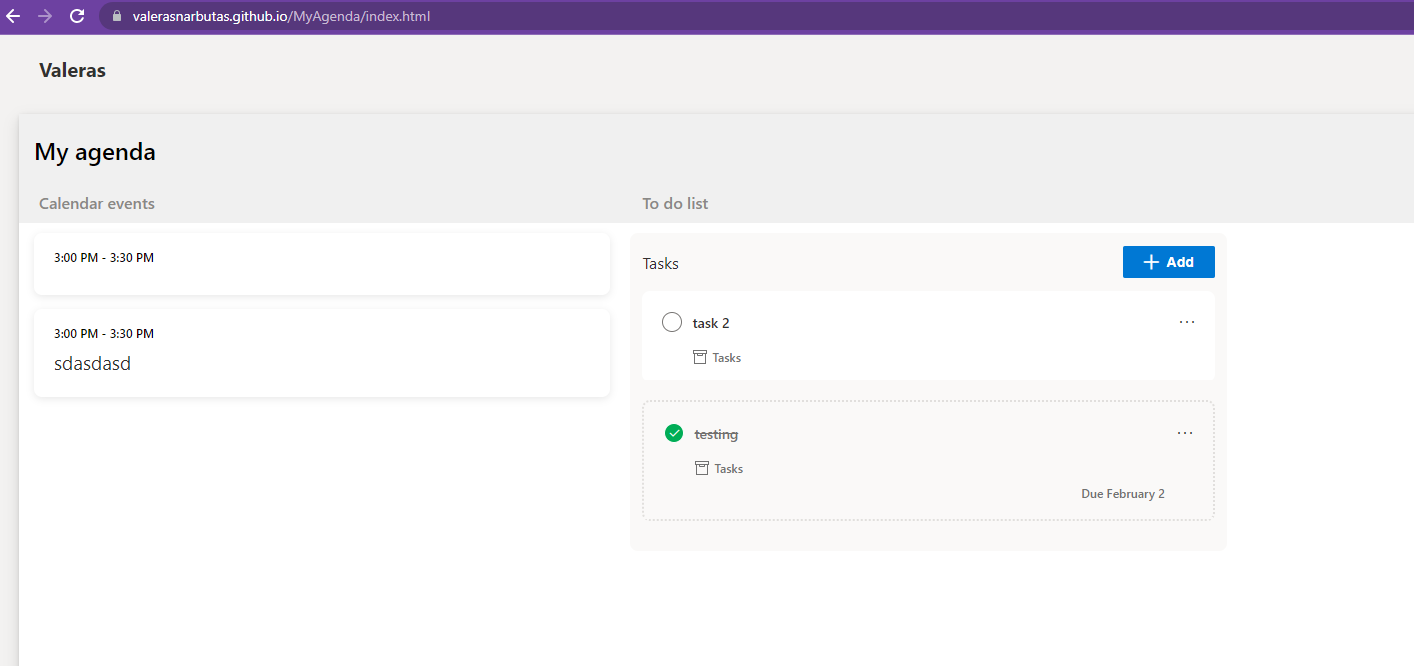
6. Go to your git page and login with your Microsoft account, you should be able to see your calendar and to do list
Example used in this post is in public repo, feel free to use it:
https://github.com/ValerasNarbutas/MyAgenda
Note: For more information about Microsoft Graph Toolkit visit https://docs.microsoft.com/en-us/graph/toolkit/overview or learn in https://learn.microsoft.com/en-us/training/paths/m365-msgraph-toolkit/
Enjoy!


